-
-
products
-
resources
-
support
-
company
-
How to factory reset your computer
By Davide De Vellis November 14, 2013computer performance, maintenance, maintenance plan, windows, Windows 7, windows vista, Windows XPNo CommentsLearning how to factory reset your computer can help you keep your PC running like new. This process will erase whatever existing data and programs you have installed on your hard drive and reinstall Windows to reset your PC to the state it was in when you first opened the box (and sometimes even better since it won’t include all the unwanted programs – crapware – that can come with most new PCs). Some people choose to reset their PC on a regular basis to keep it running at tip top shape. Most commonly this procedure is performed when a problem is encountered that cannot easily be repaired with traditional methods.
How to factory recent your computer differs depending on the version of Windows you are running and the manufacturer of your PC.
IMPORTANT: Backing up your data
Before you learn how to factory reset your computer, it is wise to backup any important files you may have.
If you are using Windows XP, you must first install the backup utility from your Windows XP installation disc.
To backup your data in Windows XP:
- Insert your Windows XP disc in your CD drive
- On the CD, navigate to X:\ValueAdd\Msft\Ntbackup (X is your drive letter)
- Click on Ntbackup.msi and run through the wizard following the instructions
- After installing the utility, click the Start Button and then click on Run
- Enter ntbackup.exe and hit enter
- Follow the on screen instructions to save the data you wish to save (Note: You will need some form of media to store your back up on. External Hard Drive, CD, DVD, USB stick, etc.)
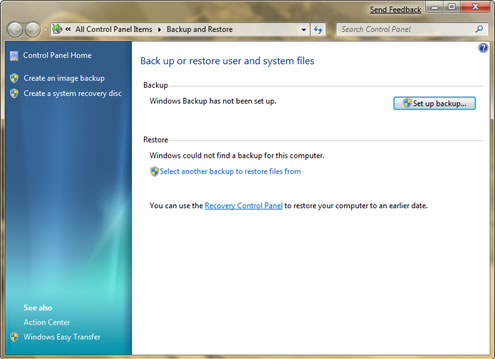
The backup process is much simpler in Windows Vista and 7. To back up your files:
- Click the Start Button and select the Control Panel
- Select System and Maintenance
- Click on Backup and Restore Center
- Select SetUp Backup
- Follow the on screen instructions to save the data you wish to save (Note: You will need some form of media to store your back up on. External Hard Drive, CD, DVD, USB stick, etc.)

“Windows Backup in Microsoft Windows 7”Windows Backup in Windows 8
Windows 8 has a couple of options for backing up your files. The first option is called Windows 8 File Recovery. This option allows you to backup your entire system. To use this first option:
- Navigate to the Start Screen
- Type in Windows 7 File Recovery
- Click Settings below the text box
- Hit Enter
- Follow the on screen instructions to save the data you wish to save. (Note: You will need some form of media to store your back up on. External Hard Drive, CD, DVD, USB stick, etc.)

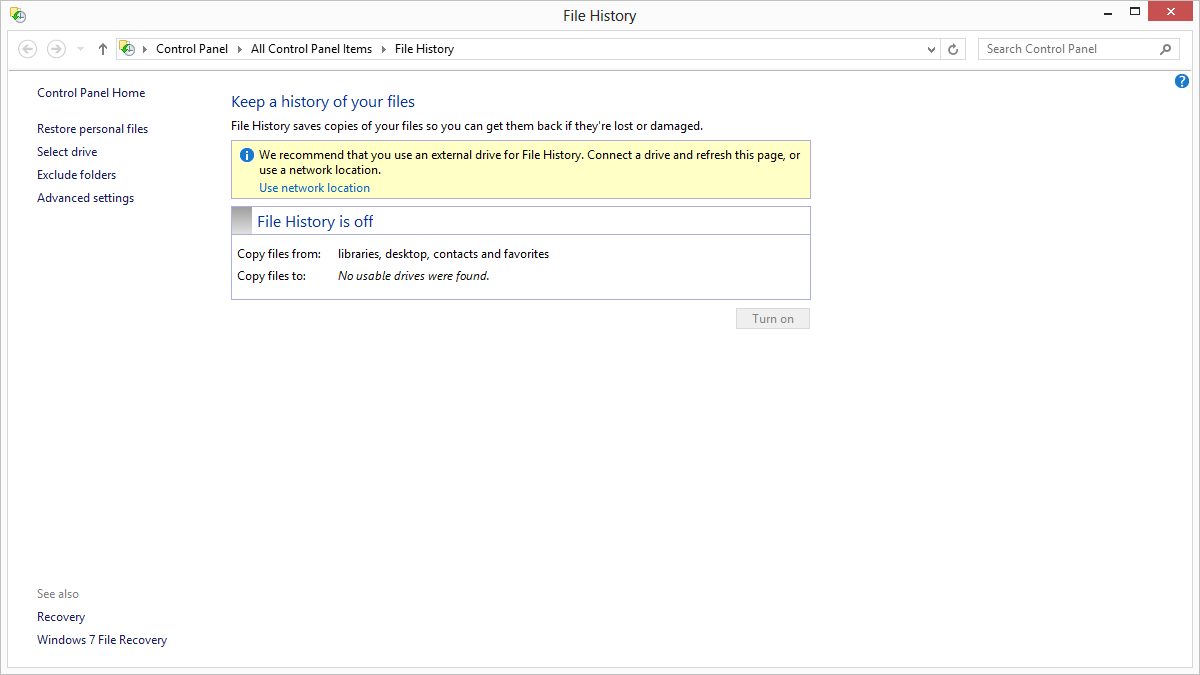
“Windows 7 Revovery in the new Microsoft Windows 8”A newer option in Windows 8 allows you more flexibility in the files that you choose to backup instead of backing up your entire system. This new option is called Windows 8 File History.
To backup your important files with this option:
- Navigate to the Start Screen
- Type in File History
- Click Settings below the text box
- Hit Enter
- Choose the location you want to back your files up to. (Note: You will need some form of media to store your back up on. External Hard Drive, CD, DVD, USB stick, etc.)
- Hit Turn On
Your PC is now set up to backup your files. You may choose which files you don’t want saved by using the Exclude Folders option on the left.

“File History in the new Microsoft Windows 8”Resetting your PC to Factory Settings
Now that you have all your important files backed up, its time to go ahead and reset your computer to factory settings. This process depends on several factors. Traditionally, PC manufacturers shipped their PCs with a recovery disc containing a copy of Windows, the necessary drivers, and other software specific to your PC. If you have an older PC, you most likely will have a recovery CD or DVD that you will need to reset your PC.
To reset a PC to factory settings with a recovery disc:
- Insert your disc into your PC
- Restart your PC
- Enter your BIOS menu (Hit the indicated key when prompted on restart)
- Find the boot order for your PC and move your CD/DVD drive to the top
- Save changes and restart
- Your PC will boot into your recovery disc and present you with a recovery wizard
- Follow the on screen instructions to restore your PC
Newer PCs do not come with a recovery disc. Instead, these PCs are shipped with a recovery partition. This is a specially designated portion of your hard drive set aside to hold all the data of a traditional recovery disc.
To restore a PC to factory settings with a recovery partition:
- Restart your PC
- When prompted, hit the indicated key to enter your recovery partition
- When presented with a recovery wizard, follow the onscreen instructions
Once your recovery wizard finishes, you will be asked to run an initial Windows setup. Enter the appropriate information and soon your PC will run as it did the day you bought it.
Was this post helpful?YesNoFree Driver Updates
Update your drivers in less than 2 minutes to enjoy better PC performance - Free.
Free Driver Updates
Update your drivers in less than 2 minutes to enjoy better
PC performance - Free.
Didn't find your answer?Ask a question to our community of experts from around the world and receive an answer in no time at all.most relevant recent articles Pin It on Pinterest