-
-
products
-
resources
-
support
-
company
-
Create a Shortcut in Any Version of Windows
By Steve Horton September 05, 2012shortcut, Windows 7, windows vista, Windows XPNo CommentsOne of the conveniences offered by any version of Windows is the ability to create shortcuts of an item, whether a shortcut to a file, a folder, or an application that the user can easily access. This is how easy it can be done.
To create a shortcut:
- Open the location, usually a folder, of the item that a shortcut must be created for.
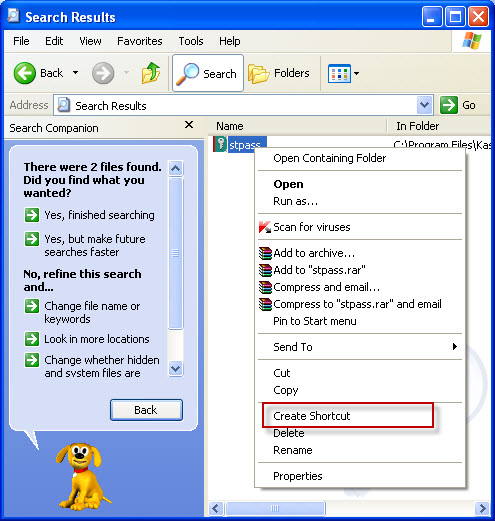
- Right-click on the item and click Create Shortcut. It will appear on the same directory where the original item is stored, and this can be distinguished by the arrow that is on the icon.
- Drag and drop this item on the preferred location. Be sure to open the folder where you want to place the item shortcut, with the originating location filling half the window of your monitor’s screen and the other half with the destination folder, for easy drag and drop.
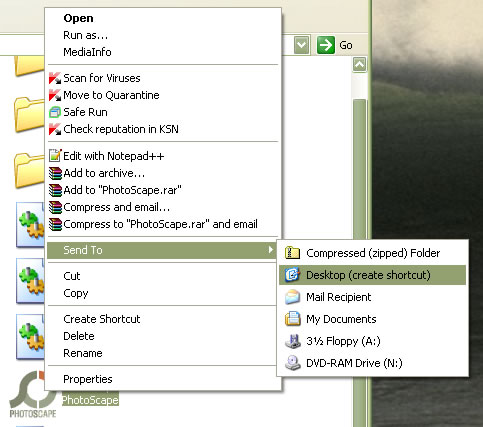
- In Windows Vista and Windows 7, you can also right-click on the item and click Send To Desktop to automatically make a desktop shortcut for it.
One of my favorite uses for these is when an application defaults to a specific folder each time you save, no matter how many times you change folders. Just create a shortcut in that default folder and have it point to where you want the files to go. That way, the next time you save, just double click on it.
Was this post helpful?YesNoFree Driver Updates
Update your drivers in less than 2 minutes to enjoy better PC performance - Free.
Free Driver Updates
Update your drivers in less than 2 minutes to enjoy better
PC performance - Free.
Didn't find your answer?Ask a question to our community of experts from around the world and receive an answer in no time at all.most relevant recent articles Pin It on Pinterest


